How to Master Live Scene Switching in OBS for Esports Casting in 2026
Learn the essentials of live scene switching in OBS for your esports cast. This guide covers scene collections, hotkeys, and pro setups for CS2/VAL.
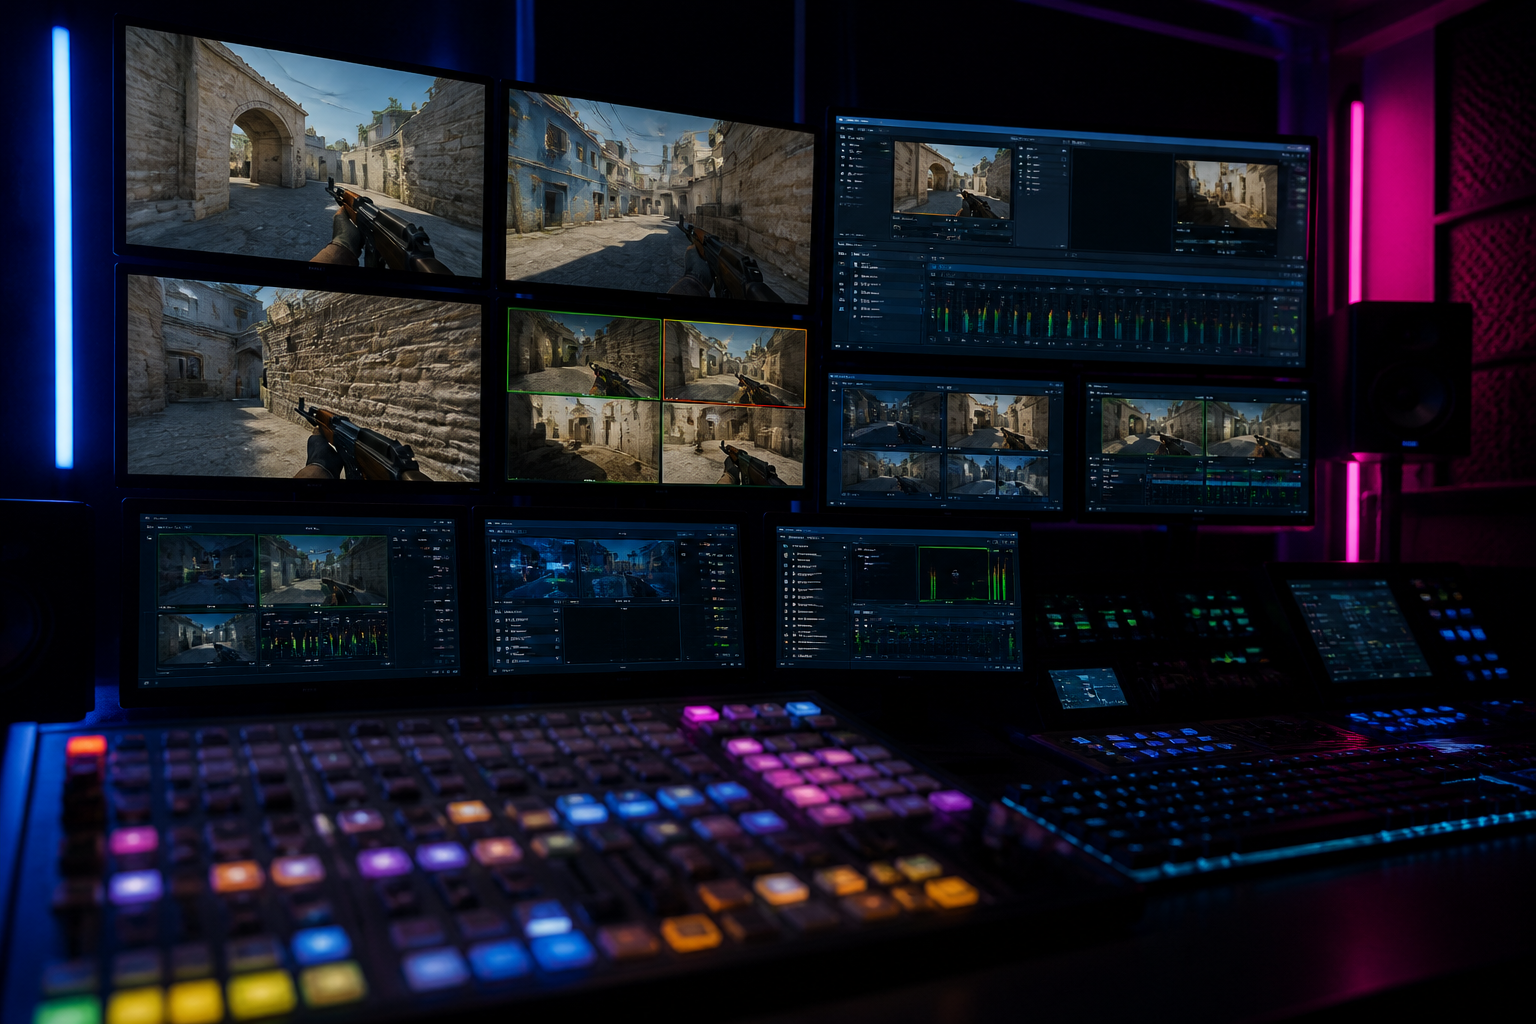
A great esports cast is more than just commentary; it's a seamless production. One missed cut or wrong scene can break the narrative tension of a crucial round. For any caster looking to elevate their broadcast, mastering the art of **live scene switching in OBS** is a non-negotiable skill. It's the technical backbone that allows your analysis and play-by-play to shine. This guide provides a complete workflow, from foundational scene collections and sources to the advanced automation techniques used in major tournaments, ensuring your production quality matches your casting talent.
Foundational OBS Scene Setup for Esports Production
Before you can switch scenes, you need to build them correctly. A scene in OBS is a container for all the visual elements your audience sees at any given moment. These elements are called 'sources' and can include game capture, webcams, images, browser windows, and video files. The first step towards a professional broadcast is organizing these scenes into a logical, manageable structure. Don't throw everything into one default collection. Instead, use OBS's 'Scene Collection' feature to create separate, self-contained production environments for each game you cast. Have one for CS2, one for VALORANT, one for Rocket League, and so on. This prevents clutter and ensures the correct overlays and sources are loaded for the right game.
Every esports casting scene collection should include a core set of scenes. This is your toolkit for telling the story of the match. While specifics vary, a robust setup generally includes a 'Starting Soon' scene with a countdown timer and sponsor logos, a 'Caster Desk' scene showing your webcam(s) for analysis, and the primary 'Gameplay' scene, which often has a picture-in-picture of your webcam. You also need dedicated scenes for specific game phases, such as a 'Map Veto' screen for CS2 or an 'Agent Select' layout for VALORANT. For post-game analysis, a 'Scoreboard' scene is essential, as is a 'Replay' scene formatted to highlight a key play you captured. Finally, having 'Be Right Back' and 'Stream Ending' scenes ensures a smooth experience for your viewers during breaks and at the end of the broadcast.
Within each scene, your sources must be configured for stability and performance. For gameplay, always prioritize 'Game Capture' over 'Window Capture' or 'Display Capture'. Game Capture hooks directly into the game's rendering process, providing the highest performance and avoiding the accidental capture of desktop notifications or other windows. For web-based graphics, like the dynamic overlays provided by HUDrift, you'll use a 'Browser' source. You simply paste the URL from your HUDrift overlays dashboard into the source's properties. For pre-recorded videos, such as intro stingers or highlight packages, the 'Media Source' is the correct tool. Properly configuring these sources is the groundwork for a stable, professional-looking broadcast.
Advanced Techniques for Live Scene Switching in OBS
With your scenes built, the focus shifts to managing the transitions between them. The most powerful, yet simple, tool for professional **live scene switching in OBS** is Studio Mode. Activating it splits the OBS interface into two identical panels: 'Preview' on the left and 'Program' on the right. 'Program' is what your audience sees live. 'Preview' is your staging area. This workflow prevents on-air mistakes. You select the next scene you want to use in the Preview panel, verify that all sources are correct and visible, and only then do you use a transition to push it to the live Program window. This deliberate, two-step process is standard practice in professional broadcasting and is essential for any serious caster.
Transitions are what make your scene changes look polished. OBS includes default 'Cut' (an instant switch) and 'Fade' transitions. While functional, they lack branding and impact. To level up, you need to use a 'Stinger' transition. A Stinger is a short video file with a transparency channel (usually in .webm or .mov format) that plays over the top of the switch from one scene to the next. It often incorporates your channel or tournament branding and provides a clean, energetic cut. For example, when switching from your caster desk to the gameplay after the 9z vs TYLOO match analysis, a branded Stinger makes the transition feel intentional and professional. You can create these yourself in software like Adobe After Effects or download professional packs to get started quickly.
Another advanced feature is the 'Downstream Keyer'. This is a special tool in OBS, often overlooked, that allows you to overlay sources on top of *everything*, regardless of which scene is active. It's perfect for elements that must always be visible, such as a tournament logo in the corner of the screen, a persistent 'LIVE' indicator, or a watermark. By placing these elements in the Downstream Keyer instead of adding them as sources to every single scene, you simplify your scene setup and ensure consistency across the entire broadcast. This saves time during setup and reduces the risk of forgetting to add a crucial branding element to a new scene.
Automating Your Workflow: Hotkeys and Remote Control
Manually clicking scenes in the OBS interface, even in Studio Mode, is slow and diverts your attention from the game. The next step in mastering your production is to move scene control to your fingertips using hotkeys. OBS has a dedicated 'Hotkeys' section in its settings where you can assign any keyboard combination to almost any action, including switching to a specific scene or triggering your main transition. Setting up a logical hotkey system is crucial for developing the muscle memory required for fast, accurate switching during a fast-paced match.
Avoid using standard function keys (F1-F12) as they can be reserved by the operating system or the game you're casting. A much better solution is to use a keyboard's numpad or a dedicated macro device like an Elgato Stream Deck. For a CS2 cast, you might map your scenes as follows: Numpad 1 for 'Caster Desk', Numpad 2 for 'Gameplay Full', Numpad 3 for 'Gameplay + Caster Cam', Numpad 4 for 'Map Veto', and Numpad 5 for 'Scoreboard'. You could then assign the Numpad '+' key as your primary 'Transition' hotkey. This way, your left hand remains on your mouse (if needed for observing) while your right hand can execute any scene change instantly without looking away from the action.
To unlock true automation, you need to allow other applications to control OBS. This is achieved via the OBS-Websocket plugin, which is now included by default in modern versions of OBS. This plugin creates a server that listens for commands from authorized external programs. It's the technology that powers devices like the Stream Deck and, more importantly, broadcast automation tools like HUDrift. By enabling OBS-Websocket and connecting it to a tool like ours, you are creating a direct link between the game's data and your visual production. You can find detailed instructions in the official OBS-Websocket documentation to ensure it is configured correctly.
Integrating HUDrift for Dynamic, Data-Driven Scene Switching
The pinnacle of modern esports production is not just switching scenes, but having scenes that react dynamically to the game itself. When casting a major event like the Esports World Cup 2026 VALORANT tournament, viewers expect to see real-time stats, ultimate statuses, and economic information presented clearly. This is achieved through Game State Integration (GSI), a system that CS2 and VALORANT use to output live data about the match. HUDrift is built to capture this GSI data and use it to power your broadcast.
After connecting HUDrift to OBS via the Websocket plugin, you can configure our tool to perform **live scene switching in OBS** automatically based on GSI triggers. Imagine a CS2 round ends; HUDrift can detect this event and automatically switch your OBS to a 'Post-Round Stats' scene for seven seconds, displaying player performance and team economy. It can then automatically switch back to your 'Caster Desk' or 'Gameplay' scene. When the bomb is planted, HUDrift can trigger a switch to a scene that prominently features the bomb timer and retake information. This level of automation means you, the caster, are freed from managing the production and can focus entirely on your commentary.
This data-driven approach transforms your broadcast. Instead of manually showing a scoreboard, the information appears at the most relevant moment without you touching a button. After a player like JBOEN has a massive performance in their debut for FaZe, as he noted when he "went beyond my own expectations", you want to immediately show the stats that back up your commentary. With an automated system, the data is already there, triggered by the end of the match. This tight integration between game events and visual presentation is what separates a basic stream from a professional-grade esports broadcast.
Managing a Full Tournament Broadcast with OBS and HUDrift
When you're running a tournament, your production needs extend beyond a single match. You have to manage brackets, player check-ins, and the downtime between games. A well-organized OBS scene collection is critical for keeping your audience engaged during these periods. You should have specific scenes ready for displaying the tournament bracket, showing the 'Upcoming Match' graphic, and a 'Technical Pause' screen for any delays. The key is to use Browser Sources for any information that changes, like the bracket itself. By pointing a Browser Source to your live bracket page on a platform like ours, the graphic updates automatically on your stream as you update it on the backend.
HUDrift streamlines the administrative side of this process, allowing you to focus on the OBS production. When you set up your event on our platform, players can sign up and connect their Discord accounts directly through the HUDrift tournaments page. Our system then takes over the communication. Players receive an automated direct message on Discord confirming their registration. An hour before the event, they get another DM with a check-in link. Once you've seeded the bracket, each player receives a final DM notifying them of their first opponent and lobby details.
This automated flow means you aren't stuck in Discord manually messaging dozens or hundreds of players. While HUDrift handles the player logistics, you can be in OBS, preparing your production. You can use the time to update the team names on your 'Upcoming Match' scene, run a pre-show segment from your 'Caster Desk' scene, or play sponsor ads on a dedicated 'Commercial Break' scene. By separating the administrative workload from the production workload, you can run a smoother, more professional event with a smaller team.
Mastering **live scene switching in OBS** is a journey from manual clicking to intelligent automation. It begins with a structured scene collection and the discipline of using Studio Mode. It progresses with the speed and efficiency of hotkeys. Finally, it culminates in a fully integrated system where tools like HUDrift use live game data to drive your production, allowing you to deliver commentary and analysis that is perfectly in sync with the on-screen action.
To implement these advanced, data-driven production techniques and let automation handle the complex scene switching for you, download HUDrift today. Experience how our direct integration with game data can elevate your broadcast, freeing you to focus on what you do best: casting the game.
Building Your Core OBS Scene Collection for Esports
Before you can switch scenes, you need scenes to switch between. A common mistake is creating too few scenes, forcing you to manually toggle sources on and off mid-broadcast. Instead, build a dedicated scene for every distinct state of your stream. This modular approach makes your production predictable and easier to manage under pressure. Think of each scene as a complete 'look' for a specific segment of your show.
Here is a foundational set of scenes every esports caster should configure in OBS Studio. Each scene should be clearly named for its purpose. Remember to use nested scenes to reuse elements like cameras and overlays without having to duplicate and manage them in multiple places.
- **Starting Soon / Countdown:** Your opening scene. This builds anticipation. Sources should include: a background video or image, a text source for a countdown timer (you can use a script or a tool like HUDrift's built-in timers), a browser source for your social media handles, and background music (via a Media Source).
- **Caster Desk (Solo/Co-caster):** This is your main analysis scene. Create versions for one caster and two (or more). Sources: Video Capture Device(s) for your camera(s), a background plate (can be a blurred game image or branded graphic), browser sources for names/lower thirds from your HUDrift overlays, and your microphone Audio Input Capture.
- **Fullscreen Gameplay:** The purest view of the action. This scene is often just one source: the Game Capture or Window Capture of the esports title (e.g., CS2, Valorant). Ensure you have a separate Audio Output Capture source for the game audio to manage its level independently from your mic.
- **In-Game with Caster Overlay:** This is your primary casting scene. It combines gameplay with your presence. Sources: A nested scene containing your Fullscreen Gameplay, and a scaled-down Video Capture Device for your picture-in-picture camera. Place your camera in a corner where it won't obstruct crucial UI elements like the minimap or kill feed.
- **Player Focus / Replay:** Essential for highlighting incredible moments. When a player like xKacpersky pulls off a 2.34-rated performance to win a map, you need a scene to break it down. This scene might feature a large replay clip (Media Source), a browser source showing the player's stats from a service like HLTV.org, and your caster camera in a smaller frame.
- **Post-Match Scoreboard:** Immediately after a match concludes, like when Lynn Vision eliminated TYLOO from the EWC qualifiers, you need to show the results. This scene should be dominated by a Browser Source from HUDrift displaying the final scoreboard, team stats, and player performance metrics. You can keep your caster cam in a corner for live reactions.
- **Tournament Bracket:** To provide context for the current match, have a scene ready that shows the full tournament bracket. This can be a simple Image source if the bracket is static, or a Browser Source pointed at the bracket page from your tournament platform. This is crucial for guiding viewers through the event narrative.
- **Technical Pause / BRB:** Issues happen. A dedicated 'Be Right Back' scene with a simple graphic, some calm background music, and perhaps a text source you can update with information, looks far more professional than a black screen or a frozen frame of gameplay.
Mastering Live Scene Switching in OBS with Hotkeys and Studio Mode
Having well-structured scenes is only half the battle; the other half is switching between them flawlessly. The key to professional **live scene switching in OBS** is to stop clicking with your mouse. Navigating a scene list during a heated teamfight is a recipe for disaster. Instead, you must use Studio Mode and a comprehensive set of hotkeys.
First, enable Studio Mode (click the 'Studio Mode' button in the OBS controls dock). This gives you two screens: Preview on the left and Program (what your viewers see) on the right. You can now select a scene in your list to load it in Preview, verify it looks correct, and then press the 'Transition' button to push it live. This simple step prevents you from ever accidentally showing a broken or incomplete scene to your audience.
Next, open OBS Settings > Hotkeys. This is where the real magic happens. For every scene in your collection, assign a unique hotkey to 'Switch to Scene'. Don't just assign them to F1, F2, etc., as these can be intercepted by the game. A good practice is to use a modifier combination like CTRL+ALT+NUMPAD 1 for your 'Starting Soon' scene, CTRL+ALT+NUMPAD 2 for your 'Caster Desk', and so on. Using the number pad creates a logical, physical layout for your scenes that you can operate by touch, without looking away from the game. You should also set hotkeys for starting/stopping your stream and recording, as well as for muting/unmuting your microphone and desktop audio sources.
Automating Transitions with the Scene Transition Matrix
A simple fade or cut transition works, but for a top-tier broadcast, you want custom transitions that match the context of the switch. For example, switching from your caster desk to the gameplay should have a high-energy stinger animation, while switching between different caster camera angles should be a quick, subtle fade. Manually changing the active transition type during a live show is impractical.
This is where plugins become essential. The most powerful tool for this job is the 'Transition Table' feature, which is now built into recent versions of OBS Studio, inspired by the original Transition Matrix plugin. You can find it by right-clicking on any scene in the 'Scenes' dock and selecting 'Transition Override'. This lets you set a specific transition (and its duration) that will be used whenever you switch *to* that particular scene. For more advanced control, you can still find community plugins that expand on this functionality.
To set this up, first add your desired transitions to the 'Scene Transitions' dock. For example, add a 'Stinger' for your gameplay and a 'Fade' for your camera scenes. Then, for your 'Fullscreen Gameplay' scene, right-click it, go to 'Transition Override', and select your Stinger. For your 'Caster Desk' scene, set its override to 'Fade'. Now, no matter what scene you are coming from, OBS will automatically use the correct transition when you switch to your gameplay or caster desk scenes using your hotkeys. This level of automation is critical for a smooth, one-person production.
Integrating HUDrift for Dynamic Control and Flawless Live Scene Switching in OBS
While OBS scene switching handles the overall layout, the data *within* those scenes needs to be dynamic. This is where HUDrift connects directly to your workflow for **live scene switching in OBS**. HUDrift's overlays are browser sources, meaning you can control what they show—scores, stats, player names, map picks—from a web-based control panel, without ever touching OBS itself. This decouples the data from the scene structure.
Imagine you are covering a VCT EMEA Stage 2 match. Your 'In-Game' scene has a HUDrift browser source for the scoreboard. As the rounds progress, you update the score in the HUDrift control panel, and it instantly updates on your stream. You don't need a separate OBS scene for every possible score combination. This dramatically simplifies your scene collection.
Furthermore, HUDrift's control panel can be configured to trigger your OBS hotkeys. Using the HUDrift desktop app, you can map actions—like 'Show Post-Match Scoreboard'—to a button. When you press this button in the HUDrift controller, it can simultaneously update the browser source overlay with the final stats *and* send the hotkey command (e.g., CTRL+ALT+NUMPAD 6) to OBS to switch to your 'Post-Match' scene. This creates a single point of control for your entire broadcast production, merging data management and scene switching into one seamless action.
A Practical Workflow for a Live Tournament Cast
Let's walk through a complete broadcast flow for a hypothetical match. You're casting a best-of-three for a tournament you're organizing through HUDrift's tournament management tools. You have your scenes, hotkeys, and HUDrift overlays configured.
T-minus 15 minutes: You are live on your 'Starting Soon' scene (CTRL+ALT+NUMPAD 1). The countdown timer is ticking down, music is playing, and a graphic shows the team logos for the upcoming match. In the HUDrift control panel, you've already input the team names and logos. T-minus 1 minute: You transition (using the Studio Mode 'Transition' button) to your 'Caster Desk' scene (CTRL+ALT+NUMPAD 2). You and your co-caster welcome the viewers, discuss the matchup, and use the HUDrift panel to show the pre-match team stats on screen.
The game is about to start. You say your transition line, "Let's get into the action!" and press CTRL+ALT+NUMPAD 3. OBS executes your custom Stinger transition and lands on the 'Fullscreen Gameplay' scene for the first pistol round. After the round, you press CTRL+ALT+NUMPAD 4 to bring up the 'In-Game with Caster Overlay' scene, placing your camera feed over the gameplay as you analyze the start. Throughout the match, you use the HUDrift panel to update the score after each round.
At the end of the map, as the final scoreboard appears in-game, you press a single button in your HUDrift control panel. This action triggers two things: it updates the HUDrift browser source to show a detailed post-match statistical breakdown, and it sends the hotkey CTRL+ALT+NUMPAD 6 to OBS. OBS transitions you smoothly to your 'Post-Match Scoreboard' scene, where you and your co-caster can break down the performance. This is the power of an integrated system—one action, multiple professional results. You've successfully managed a complex production without ever looking like you were fighting your tools.
By structuring your scenes logically, committing hotkeys to muscle memory, and leveraging automation tools, you can elevate your esports broadcast from a simple stream to a polished production. The goal is to make the technology invisible, allowing your casting and analysis to shine. Start by building out your core scenes, practice your transitions, and explore how an integrated solution can streamline your entire workflow.
Ready to build a professional-grade broadcast? Download HUDrift today and gain access to a full suite of overlays and control tools designed specifically for esports production. Combine it with the OBS techniques in this guide to create a seamless experience for your viewers.
Frequently Asked Questions
- What is the best way to organize OBS scenes for esports?
- Use Scene Collections to separate setups for different games (e.g., one for CS2, one for VALORANT). Within a collection, name scenes logically (e.g., 'Gameplay+Caster', 'Full Caster Cam', 'Scoreboard') and use text separators to group them. This keeps your list clean and makes finding the right scene during a live cast much faster, improving your production quality.
- Can you automate scene switching in OBS?
- Yes. The most common method is using the OBS-Websocket plugin, which allows external applications to control OBS. Tools like HUDrift use this, combined with Game State Integration, to trigger scene changes automatically based on in-game events like round ends, bomb plants, or match conclusions, significantly reducing the caster's manual workload and preventing errors.
- What is Studio Mode in OBS and should I use it?
- Studio Mode splits your OBS window into a 'Preview' and 'Program' (live) view. It lets you prepare your next scene in Preview before making it live with a transition. You should absolutely use it for any professional broadcast, as it prevents accidental switches and allows you to cue up scenes smoothly and verify them before the audience sees them.
- How do hotkeys improve live scene switching in OBS?
- Hotkeys allow you to switch scenes without using your mouse to click in the OBS window. This is faster, more reliable, and lets you keep your eyes on the game. Assigning scenes to a numpad or a dedicated device like a Stream Deck creates muscle memory, making your production seamless and reducing the chance of on-air mistakes during intense moments.
- Do I need multiple PCs for professional OBS scene switching?
- While a dual-PC setup is common for high-end production to ensure maximum performance, it is not strictly necessary. A single powerful PC can handle both gaming and streaming, especially with tools like HUDrift that automate many production tasks. Start with one PC and optimize your OBS settings before deciding to invest in a second machine.
- How many OBS scenes do I need for esports casting?
- Start with 7-8 core scenes: Starting Soon, Caster Desk, Fullscreen Game, In-Game with Overlay, Replay/Highlight, Post-Match Stats, Bracket View, and a Technical Pause/BRB screen. This modular setup covers every segment of a typical broadcast. Avoid creating scenes for minor variations; use dynamic browser source overlays from tools like HUDrift to change data within a single scene, keeping your collection manageable and easy to navigate with hotkeys.
- What is the best OBS transition for esports?
- There isn't one single 'best' transition; context is key. Use a high-energy Stinger transition when switching from a caster desk to live gameplay to build excitement. For switches between different camera angles or informational scenes, a simple Cut or a quick 300ms Fade is less jarring for the viewer. Use the 'Transition Override' feature in OBS to assign specific transitions to each scene automatically, ensuring the right effect is always used.
- Can I switch OBS scenes from my phone?
- Yes, you can control OBS from a phone or tablet. The most common method is using apps like Touch Portal or a web-based solution like the one included with the OBS WebSocket plugin. These tools allow you to create a custom soundboard-style interface on your device with buttons that trigger OBS hotkeys for scene switching, muting audio, or starting/stopping your stream. This can be a great alternative to a dedicated Stream Deck.
- Does HUDrift work with a Stream Deck?
- Yes, HUDrift integrates well with the Elgato Stream Deck. You can configure Stream Deck buttons to trigger specific hotkeys. Since HUDrift's control panel can be mapped to keyboard shortcuts, you can assign a Stream Deck button to perform a HUDrift action (like updating a score) and another button to perform an OBS action (like switching scenes). For advanced users, you can create multi-action buttons to do both simultaneously for a one-press production workflow.
- How do I show a tournament bracket on my stream?
- The easiest way is to use a Browser Source in OBS. If your tournament is run on a platform like HUDrift, Start.gg, or Challonge, you can copy the URL of the public bracket page and paste it into the Browser Source's properties. This keeps the bracket live and updated. For offline events, you can create a graphic of the bracket as a PNG image and use an Image Source in a dedicated 'Bracket' scene.