How to Use a Stream Deck for Esports Casting
Learn how a Stream Deck for casting can elevate your esports broadcast. Master OBS scene switching, instant replays, and overlay control for a pro setup.
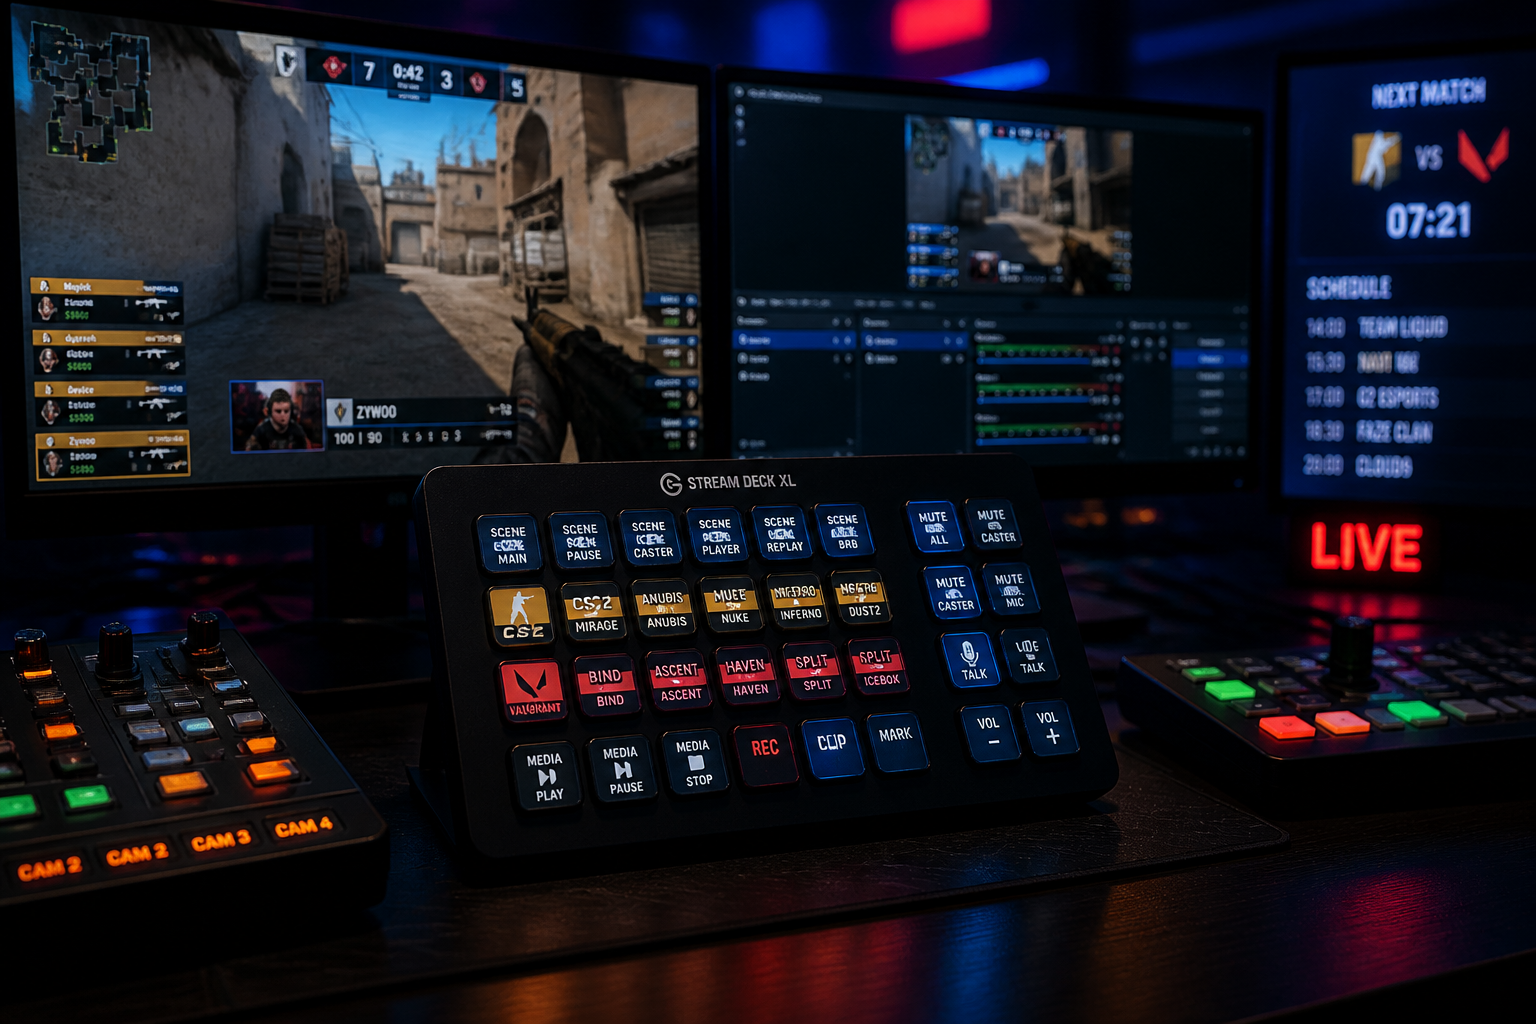
The margin between an amateur and a professional esports broadcast is often found in the smoothness of its production. As a solo caster or part of a small team, juggling scene changes, replays, graphics, and audio while delivering insightful commentary is a significant challenge. This is where a dedicated hardware controller becomes essential. Using a **stream deck for casting** allows you to map complex production actions to single button presses, freeing up your mental capacity to focus on the match. This guide will walk you through the specifics of setting up an Elgato Stream Deck with OBS Studio to manage every aspect of your esports broadcast, from basic scene switching to advanced replay and overlay control with tools like HUDrift.
Initial Setup: Connecting Your Stream Deck for Casting
Before you can orchestrate a symphony of production cues, you need to connect your instruments. The initial setup for your Stream Deck is straightforward but requires a few key software components to work seamlessly with your broadcasting software. First, physically connect your Stream Deck device to your PC via a reliable USB port. Avoid using unpowered USB hubs, as they can sometimes cause intermittent connection issues; a direct port on your motherboard's I/O is always the best choice for stability during a live broadcast.
Next, you'll need two pieces of software. Download and install the official Elgato Stream Deck software from their website. This is the central hub where you will configure every button, create profiles, and assign actions. The second, and most critical, component for our purpose is the OBS WebSocket plugin. As of OBS Studio 28 and later, this functionality is integrated directly into OBS, but you must ensure it's enabled. Navigate to Tools > WebSocket Server Settings in OBS and check the 'Enable WebSocket Server' box. This plugin creates a communication bridge that allows the Stream Deck software to send commands directly to OBS. Without this, your Stream Deck cannot control your scenes or sources.
With the software installed and configured, you can begin creating profiles. A powerful strategy is to create a unique profile for each game you cast. A CS2 cast has different needs than a Valorant or Rocket League cast—different overlays, scene layouts, and hotkeys. In the Stream Deck software, you can create a 'CS2 Casting' profile and a 'Valorant Casting' profile, each with its own button layout. You can even set the Stream Deck to automatically switch to the correct profile when the game's .exe file becomes the active window, ensuring your controls are always ready for the specific title you're covering. This foundational work is crucial, much like how the team HUASOPEEK acknowledges they are building their fundamentals to reach tier-one status. A solid production workflow is your fundamental.
Mastering Scene Switching in OBS for a Flawless Broadcast
The most fundamental function of a **stream deck for casting** is managing your OBS scenes. A typical esports broadcast isn't a single, static view; it's a collection of different scenes you transition between to structure the show. Your goal is to map each of these scenes to a dedicated button on your Stream Deck for instant, one-touch switching, eliminating the need to alt-tab and click around in the OBS interface mid-cast.
Start by building out your core scenes in OBS. For a standard tournament broadcast, you will likely need at least the following:
- **Starting Soon:** A pre-show screen with a countdown timer, background music, and sponsor logos or tournament branding.
- **Analyst Desk:** A scene featuring webcam feeds of you and your co-casters, often with a branded background and space for analytical graphics.
- **Map Veto:** A specific scene for displaying the map selection and ban process before a match begins.
- **Live Game:** The main scene, containing the game capture source along with your HUDrift broadcast overlay and caster cameras in a picture-in-picture layout.
- **Full Caster Cam:** A scene that switches to a full-screen view of you and your co-caster, perfect for halftime analysis or discussing a technical pause.
- **Post-Match:** A scene for displaying final scoreboards, player statistics, and the tournament bracket.
- **Be Right Back / Technical Pause:** A simple screen to display when you need to step away or there's a delay in the game.
Once these scenes exist in OBS, open the Stream Deck software. On the right-hand side, find the 'OBS Studio' category of actions. Drag the 'Scene' action onto an empty button on the virtual Stream Deck grid. In the properties for that action, you will see a dropdown menu listing all the scenes in your currently connected OBS collection. Select the desired scene, for example, 'Live Game'. You can then set a custom icon for the button, making it easy to identify at a glance. Repeat this process for every scene you've created, laying them out logically on your device. Consider grouping them; for instance, place all pre-game scenes on the left, live game scenes in the center, and post-game scenes on the right.
To elevate this further, use the 'Multi Action' feature. Instead of just switching to your 'Live Game' scene, you might want to simultaneously mute your 'Starting Soon' background music and unmute the game audio source. A Multi Action allows you to stack these commands onto a single button press. You would add three actions to the sequence: 'Audio Mixer: Set Mute (Off) for Game Audio', 'Audio Mixer: Set Mute (On) for Music', and 'Scene: Switch to Live Game'. This level of automation is what separates a smooth broadcast from a clunky one.
Advanced Stream Deck for Casting: Instant Replays and Stingers
Instant replays are a hallmark of professional sports and esports broadcasts. While they might seem complex, OBS's Replay Buffer feature, combined with a Stream Deck, makes them surprisingly manageable for a solo operator. The Replay Buffer continuously records the last few seconds of your stream to your computer's RAM or a fast SSD. You can then save this buffer as a video file and play it back on stream with the press of a button.
To set this up, go to Settings > Output in OBS. Set the Output Mode to 'Advanced'. Click the 'Replay Buffer' tab and check 'Enable Replay Buffer'. The 'Maximum Replay Time' determines the length of your replays; 20-30 seconds is a good starting point for most esports. Note the 'Maximum Memory' usage, as this feature can be RAM-intensive. In the Settings > Hotkeys menu, assign a keyboard shortcut to 'Replay Buffer: Save' (e.g., F9), though we will ultimately trigger this with the Stream Deck instead of the keyboard.
Next, create a new scene in OBS called 'Instant Replay'. In this scene, add a 'Media Source'. Uncheck 'Local File', and in the properties, find the setting to play the most recent file from your replay buffer save path. Now, on your Stream Deck, configure a Multi Action button. The first action in the sequence should be 'Replay Buffer: Save'. The second action should be 'Scene: Switch to Instant Replay'. This single button press will save the last 20 seconds of gameplay and immediately switch to the scene that plays it back. To make it even slicker, set a 'Stinger' as your global transition in OBS (under Scene Transitions) that plays a short, branded animation when you switch scenes. This gives your replay a professional entrance.
This functionality is invaluable for reacting to unexpected moments. For example, in a recent CS2 tournament, news broke that Gratisfaction would be standing in for FlyQuest at DFRAG. A prepared caster could use a separate Stream Deck button to trigger a pre-made video file of Gratisfaction's highlights. Having a folder of keys mapped to player-specific highlight reels, controlled via your Stream Deck, allows you to add immense narrative value to your cast with minimal effort, reacting to roster news or standout plays in real-time.
Controlling HUDrift Overlays and Graphics
Modern esports broadcasts rely on data-rich overlays to inform the viewer. HUDrift provides these overlays for titles like CS2 and Valorant, which you add to OBS as 'Browser Source' layers. While many HUDrift elements are automated based on game data, you often want manual control over when specific graphics appear. Your Stream Deck is the perfect tool for this, allowing you to toggle the visibility of any browser source without touching your mouse.
In your 'Live Game' scene, you might have several HUDrift browser sources: one for the main stat bars, one for post-round player damage, and another for a special 'Bomb Planted' alert. To control these, drag the 'Source: Toggle Visibility' action from the Stream Deck's OBS menu onto a button. In the action's properties, select your 'Live Game' scene and then choose the specific browser source you want to control, for example, 'HUDrift_PostRound_Stats'.
Now, when a round ends and you want to discuss the damage output, you can press this button to show the stats panel. Press it again to hide it and return to a cleaner view. You can create dedicated buttons for various graphic elements: showing/hiding a tournament bracket, displaying player head-to-head stats, or triggering a lower third with a player's social media handle. This granular control keeps your screen from becoming cluttered and directs the viewer's attention to the information you are currently discussing.
This integrates directly with HUDrift's tournament management features. When you're running an event through our platform, players receive Discord notifications when their match is ready. As the caster and tournament organizer, you'll know exactly which teams are playing next. You can have a Stream Deck folder prepared for the 'Grand Finals', with buttons that trigger custom lower thirds for each player on the two finalist teams. This preparation transforms your broadcast from a generic stream into a tailored production for that specific match. You can explore our full suite of tournament tools on our tournaments page.
Audio Management for a Professional Sound
Excellent audio is non-negotiable for a quality cast. A Stream Deck provides an intuitive tactile interface for managing all your audio sources in OBS. This prevents common audio mistakes like talking over music, having game sounds be too loud, or forgetting to unmute your microphone after a break. The most critical actions are 'Audio Mixer: Toggle Mute' and 'Audio Mixer: Set Volume'.
Create a dedicated section on your Stream Deck for audio. Have a button for your primary microphone, your co-caster's audio (if they are remote via Discord or VDO.Ninja), the game audio, and any music or video sources. Using 'Toggle Mute' allows you to quickly silence a source. A 'cough button' is a popular and professional use case: a momentary mute for your own mic. You can achieve this with the 'Push-to-Mute' action in the Stream Deck's audio category.
Beyond muting, you can create a soundboard. Create a new folder on your Stream Deck and fill it with 'Soundboard' actions. Drag audio files—like hype stingers, crowd noise, or funny drops—onto these buttons. You can configure them to play through your stream's audio mix without you hearing them, preventing them from being distracting in your headphones. This adds another layer of entertainment and production value, especially during downtime.
Investing time in a robust audio setup controlled by your Stream Deck is a way to future-proof your production capabilities. Whether you're casting a small online qualifier today or preparing for a broadcast of a major event like the one BLAST is hosting in Ulaanbaatar in 2027, a clean and controlled audio experience is a universal requirement for professionalism. You can also use Multi Actions to manage audio during scene transitions. For instance, the button that switches to your 'Post-Match' scene could also automatically lower the game volume and raise the analyst desk microphone levels.
By mapping these complex scene, replay, graphic, and audio commands to your Stream Deck, you offload the mechanical tasks of production. This frees you to focus entirely on delivering sharp, engaging commentary. Your actions become faster, more precise, and more professional, allowing you to punch above your weight class, whether you're a solo caster or a small team.
To get started with broadcast-quality graphics that you can control with your new Stream Deck setup, download HUDrift today. Our overlays for CS2, Valorant, and Rocket League are designed for seamless integration with OBS and are the perfect visual complement to a professionally produced cast.
Frequently Asked Questions
- Can I use a Stream Deck for casting on Kick or YouTube?
- Yes. The Stream Deck doesn't connect to the streaming platform directly. It integrates with broadcasting software like OBS Studio or Streamlabs OBS. Since you can use OBS to stream to any platform, including Twitch, Kick, and YouTube, any Stream Deck configuration you create for OBS will work perfectly for your casts regardless of where you're live. The key is the connection between the Stream Deck and OBS via the WebSocket plugin.
- What's the difference between a Stream Deck MK.2 and XL for casters?
- The primary difference is the number of keys. The Stream Deck MK.2 has 15 customizable LCD keys, while the Stream Deck XL has 32. For complex esports productions with many scenes, replay triggers, soundboard effects, and graphic toggles, the XL is highly recommended. It minimizes the need to navigate through folders for actions, putting more controls on the top layer for instant access. The MK.2 is still very capable but may require more strategic use of folders.
- Does HUDrift have a native Stream Deck plugin?
- HUDrift does not currently have a native Stream Deck plugin. However, you can control every aspect of our overlays using the Stream Deck's native OBS integration. Since HUDrift overlays are added to OBS as browser sources, you can use the 'Source: Toggle Visibility' action on your Stream Deck to show or hide any graphic element on command. This provides complete and seamless control over the HUDrift graphics during your live broadcast without needing a separate plugin.
- How much does a professional casting setup with a Stream Deck cost?
- The cost can vary, but the core components are accessible. The Stream Deck itself ranges from about $150 for an MK.2 to $250 for an XL. The essential software, OBS Studio, is free. HUDrift's core overlay features for CS2 and Valorant are also free to use. This means you can achieve a highly professional setup for the cost of the Stream Deck device itself. Premium features and more advanced overlays are available through our pricing plans, but are not required to get started.